
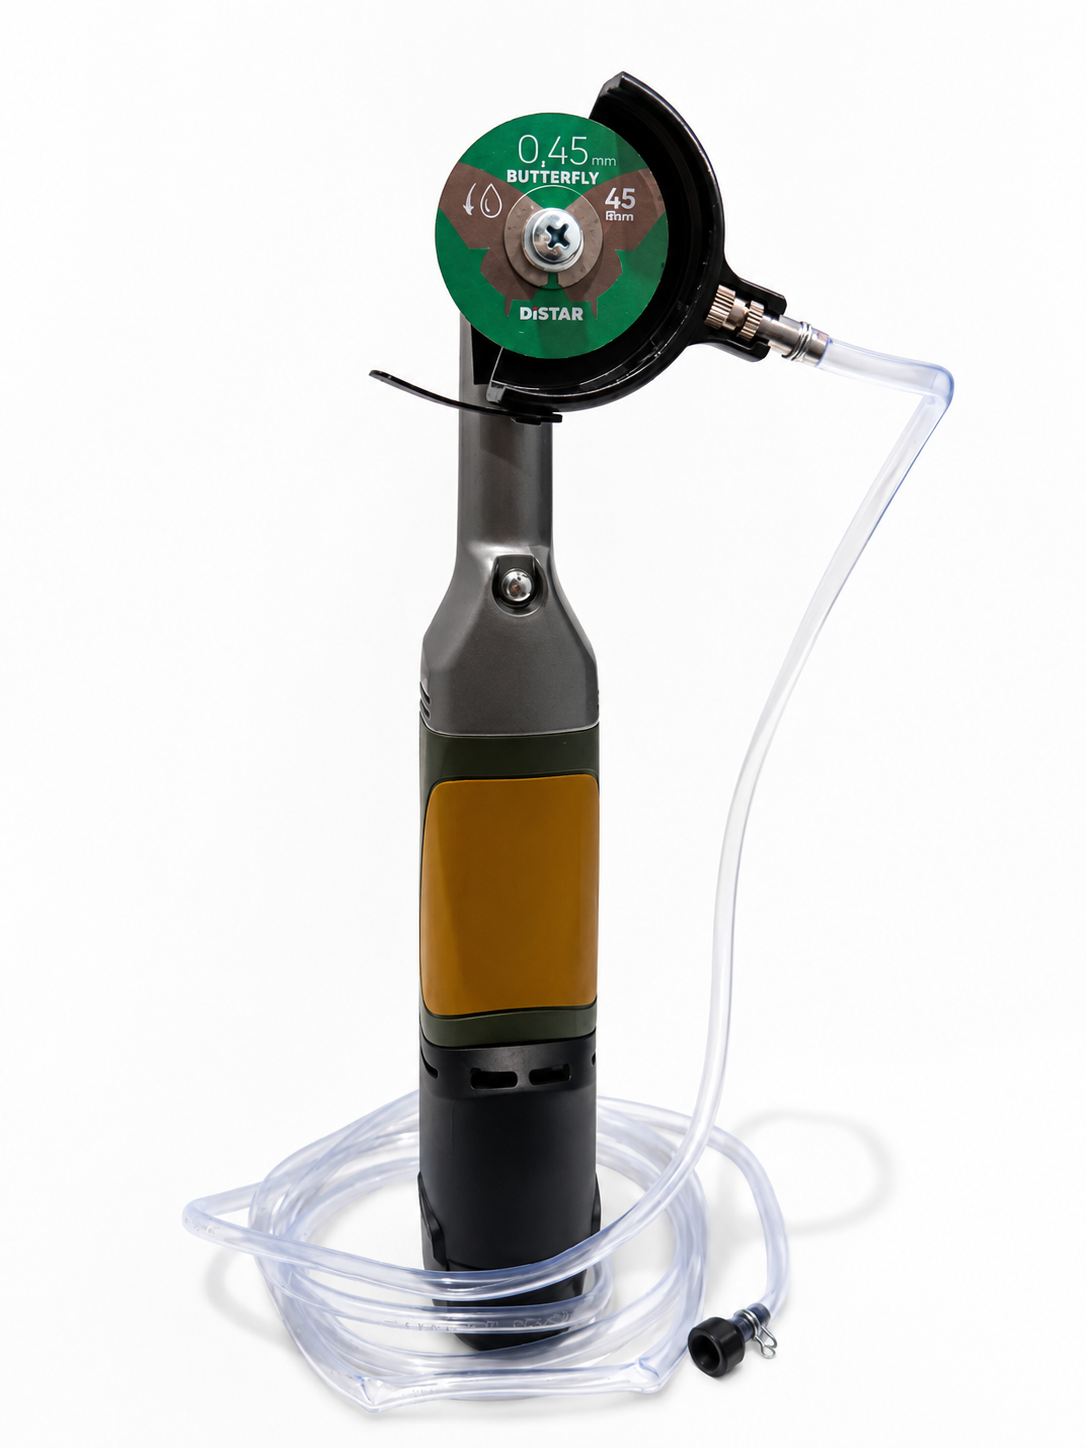
The Proxxon LWB/A is one of the most capable cordless long-neck tools for tile and stone work — but running it dry leaves performance and safety on the table. Wet cutting with the DiStar Water Guard Kit reduces airborne silica dust, extends blade life, and produces cleaner cuts with less chipping. This guide walks you through the complete setup and process.
What You'll Need
- Proxxon LWB/A Cordless Long Neck Rotary Tool (No. 39805) — with charged battery
- DiStar Water Guard Kit for Proxxon LWB/A — matched water feed attachment
- Diamond cutting disc — see blade selection guide below
- Clean water source — garden hose, water bottle with tube, or wet cutting water supply system
- PPE — safety glasses, hearing protection, nitrile gloves
- Tile or stone workpiece secured to a stable surface
Step 1 — Choose the Right Blade
Blade selection depends on the material and the type of cut:
| Blade | Best For | Kerf |
|---|---|---|
| Proxxon UNI Cut 45mm | General tile, stone, ceramic, glass — all-rounder | Standard |
| Proxxon Slim Cut 45mm | Ultra-fine detail cuts, minimal chipping | 0.6mm |
| DiStar Butterfly 2" | General tile and stone — included in Tile Pro Kit | Standard |
| DiStar Mastercut 2" | Hard porcelain and quartzite | Standard |
Pro tip: For hard porcelain and large-format tile, the DiStar Mastercut is the better choice. For general ceramic and softer stone, the UNI Cut or Butterfly handles everything cleanly.
Step 2 — Install the Diamond Disc
- Ensure the LWB/A is powered off and the battery is removed before installing any disc.
- Select the correct collet for your disc's arbor diameter — the LWB/A ships with 6 MICROMOT collets (1.0–3.2mm).
- Insert the disc arbor into the collet and tighten the collet nut firmly with the included wrench.
- Reinstall the battery.
Step 3 — Attach the DiStar Water Guard Kit
- Slide the water guard housing onto the LWB/A neck — it's designed to fit the LWB/A geometry without adapters.
- Secure the water guard according to the kit instructions — it should sit snugly with no play.
- Connect your water supply tube to the water guard inlet. A gravity-fed water bottle, squeeze bottle with tubing, or low-pressure garden hose all work well.
- Route the tube so it won't interfere with your cutting motion or get caught on the workpiece.
Step 4 — Set Up Your Workpiece
- Secure the tile or stone to a stable surface — clamps, a non-slip mat, or a dedicated tile cutting station.
- Mark your cut line clearly with a pencil or tile marker.
- Position yourself so the water runoff flows away from you and your power source.
- Keep the work area clear of trip hazards — wet cutting produces water runoff that can make floors slippery.
Step 5 — Start the Water Flow Before Cutting
This is the step most people skip — and it's the most important one. Always start the water flow before you start the tool. Running the disc dry even for a few seconds generates heat that can damage the diamond bond and shorten blade life significantly.
- Open the water supply and confirm flow is reaching the blade before powering on the LWB/A.
- Adjust flow rate to match your cutting intensity — more aggressive cuts need more water. A light, steady stream is usually sufficient for detail work.
- The water should visibly wet the cutting zone and carry slurry away from the cut line.
Step 6 — Make the Cut
- Power on the LWB/A and allow it to reach full speed before contacting the tile.
- Apply light, consistent forward pressure — let the diamond do the work. Forcing the cut generates heat and wears the blade faster.
- Keep the disc perpendicular to the tile surface for straight cuts, or angle as needed for detail work.
- For outlet penetrations and inside corners, use the LWB/A's long-neck geometry to reach areas a standard grinder can't access.
- Maintain consistent water flow throughout the cut.
Step 7 — After the Cut
- Power off the LWB/A before stopping the water flow.
- Rinse the water guard, disc, and tool neck with clean water to remove slurry buildup.
- Dry all components before storage — slurry left to dry can clog the water guard and corrode metal components.
- Inspect the disc for wear — a worn diamond disc will cut slower and produce more heat. Replace when cutting performance drops noticeably.
Silica Dust & OSHA Compliance
Wet cutting is one of the most effective engineering controls for silica dust exposure under OSHA's silica standard (29 CFR 1926.1153). When cutting tile and stone — especially porcelain, granite, and engineered stone — dry cutting generates respirable crystalline silica dust at levels that can cause silicosis with repeated exposure.
Wet cutting with the DiStar Water Guard Kit suppresses the vast majority of airborne dust at the source. For indoor work or enclosed spaces, wet cutting is not optional — it's the baseline control measure.
Troubleshooting
| Problem | Likely Cause | Fix |
|---|---|---|
| Blade cutting slowly | Insufficient water flow or worn disc | Increase water flow; inspect disc for wear |
| Chipping on cut edge | Too much feed pressure or wrong blade | Reduce pressure; switch to Slim Cut for fine work |
| Water not reaching blade | Blocked water guard inlet or kinked tube | Clear blockage; straighten supply tube |
| Tool overheating | Running dry or excessive load | Confirm water flow before cutting; reduce feed pressure |
| Slurry buildup on disc | Insufficient water flow | Increase water flow to flush slurry continuously |
Get the Complete Kit
If you want everything in one box, the Proxxon LWB/A Tile Pro Kit includes the LWB/A (with battery and charger), the DiStar Water Guard Kit, the DiStar Butterfly 2" blade, and the DiStar Mastercut 2" blade — ready to run wet out of the box.
Or build your own setup:
- Proxxon LWB/A with Battery & Charger — $290
- DiStar Water Guard Kit for LWB/A — $28.56
- Proxxon UNI Cut 45mm Diamond Disc
- Proxxon Slim Cut 45mm Diamond Disc
Frequently Asked Questions
Can I wet cut with the LWB/A without the DiStar Water Guard Kit?
Technically yes — you could direct water manually — but the water guard delivers a controlled, consistent flow directly to the cutting zone. Without it, you'll get inconsistent cooling, more mess, and less effective dust suppression.
How much water flow do I need?
A light, steady stream is sufficient for most tile cutting. The goal is to keep the blade wet and carry slurry away from the cut — not to flood the workpiece. Adjust based on cutting intensity.
Can I use the LWB/A for wet cutting indoors?
Yes — that's one of its primary advantages. The cordless design and compact long-neck geometry make it ideal for indoor tile work. Wet cutting controls silica dust at the source, making it the preferred method for enclosed spaces.
What's the difference between the LWB/A and LHW/A for wet cutting?
The LWB/A uses a collet system for smaller-diameter discs (45mm). The LHW/A uses a center-bore disc mount for 50mm discs. Both can be used for wet cutting with the appropriate water guard. Full comparison here →