
Marking large format tile accurately is one of the most critical — and most error-prone — steps in any installation. A single miscalculation on a 48" x 96" porcelain slab can mean a cracked tile, a delayed project, and a costly replacement. This guide walks professional installers through the right tools and techniques to transfer outlet, pipe, and cut positions onto oversized tiles without guesswork.
Why Large Format Tile Is Harder to Mark Accurately
Standard tile marking techniques break down at scale. The larger the tile, the more a small angular error compounds across the surface. Common problems include:
- Tape measures that flex or shift on slick porcelain surfaces
- Pencil lines that are difficult to see on dark or textured slabs
- Outlet and pipe positions that are measured from multiple reference points, multiplying error
- No reliable way to transfer an irregular hole shape without a template
Manual measuring on large-format tile is slow, imprecise, and unforgiving. A tile template tool eliminates most of these variables.
Tools You'll Need
- Tile template tool — for transferring outlet, pipe, and cut positions directly onto the tile surface. The Mechanic TileTEMPLATE XL is designed specifically for tiles up to 118" x 79".
- Adjustable work table — a stable, level surface is essential for accurate marking. The CeraMAX 1200 Telescope 2.0 supports large-format slabs and adjusts for 45° miter cuts.
- Angle grinder with diamond blade — for making straight cuts and notches at marked positions. Pair with a 2" diamond blade rated for porcelain and a long-neck angle grinder for tight access.
- Diamond core bits — for drilling circular holes at outlet and pipe positions. Use dry-rated core bits for cordless drill compatibility on the job site.
Step-by-Step: Marking Outlets, Pipes & Corner Cuts
Step 1 — Set Up Your Work Surface
Place the tile on a stable work table. For slabs over 48", use an adjustable support table to prevent flex. Ensure the tile is clean and dry — dust and debris will cause your template to shift.
Step 2 — Locate Your Reference Points
Identify the position of each outlet box, pipe stub, or structural element relative to the tile's edge. Measure from two perpendicular reference points (e.g., wall corner and floor) to establish X and Y coordinates for each feature.
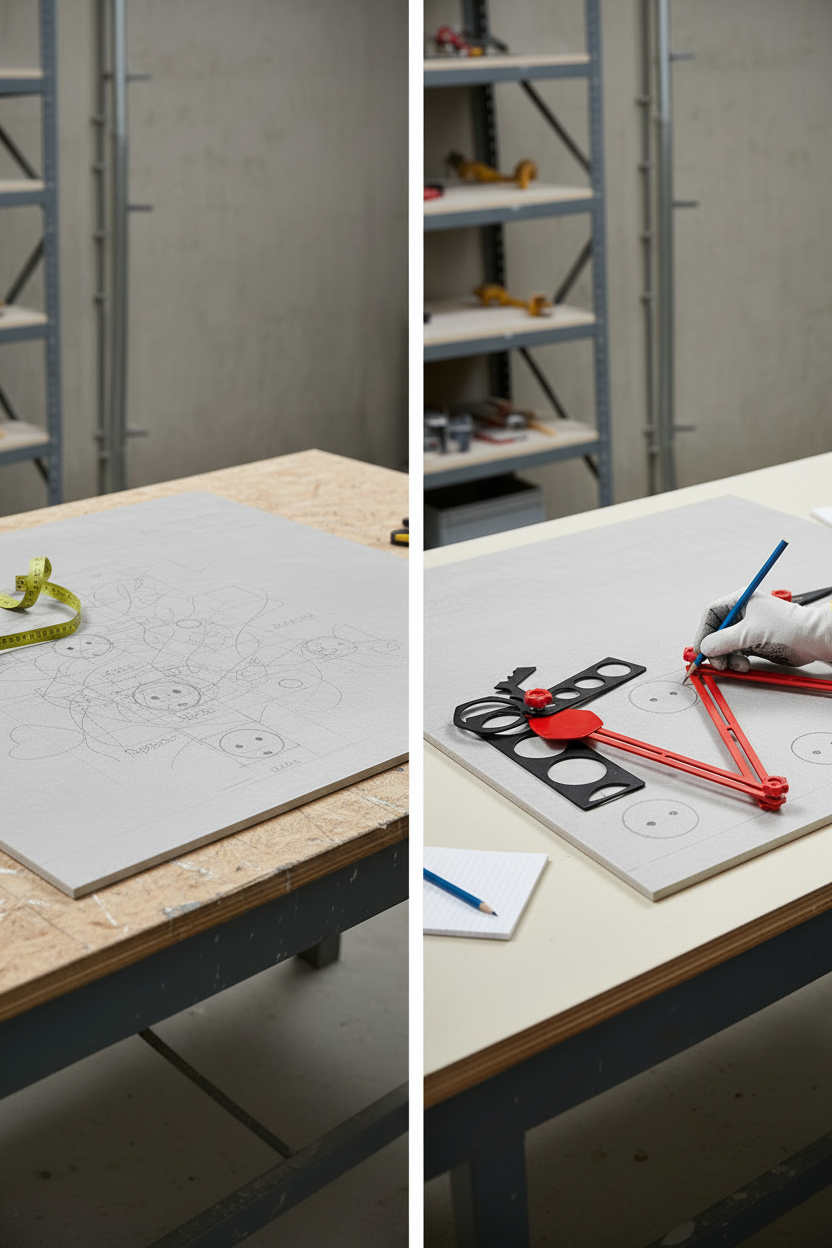
Step 3 — Position the Tile Template Tool
Place the tile template tool over the tile, aligning it to your reference measurements. The TileTEMPLATE XL uses a direct-transfer system — position the tool over the actual outlet box or pipe stub, press to capture the position, then transfer it to the tile surface. No secondary measuring required.
Step 4 — Mark Outlet & Pipe Holes
Use the template's nozzle system to mark the hole diameter directly on the tile. For standard outlet boxes, use the fixed nozzle. For non-standard pipe diameters, the adjustable nozzle accommodates irregular sizes. Mark the center point and perimeter clearly.
Step 5 — Mark Straight Cuts & Notches
For column wraps, corner returns, and L-shaped cuts, use the template's straight-edge guides to transfer the cut line. Score lightly with a marking tool before committing — on polished porcelain, a fine-tip marker works better than pencil.
Step 6 — Double-Check Before Cutting
Before picking up any cutting tool, verify each mark against your reference measurements. On large-format tile, it's worth the 60 seconds — a misplaced hole cannot be undone.
Step 7 — Cut & Drill
Use a diamond core bit to drill circular holes at marked outlet and pipe positions. Start at low speed to prevent chipping at the entry point. For straight cuts and notches, use an angle grinder with a porcelain-rated diamond blade. Work from the marked line inward to avoid overcutting.
Common Mistakes & How to Avoid Them
- Measuring from a single reference point — always use two perpendicular references to triangulate position accurately.
- Skipping the work table — marking on an unsupported slab introduces flex and shifts your template mid-transfer.
- Using the wrong core bit — standard masonry bits will chip porcelain. Use diamond-tipped core bits rated for hard ceramics.
- Cutting at full speed immediately — start slow to score the glaze, then increase speed. This prevents edge chipping on polished surfaces.
- Not accounting for grout joint offset — if the tile will be set with a grout joint, factor that offset into your reference measurements before marking.