
Granite countertop fabrication is one of the most demanding workflows in the stone trade. Done right, it produces a finished product that lasts decades. Done wrong, it produces callbacks, cracked slabs, and unhappy clients. This guide walks through the complete shop workflow — from the first site visit to final installation — with the tool decisions and technique details that separate good work from great work.
Skill Level: Intermediate–Advanced | Typical Job Time: 2–4 days shop-to-install
Step 1: Templating
Accurate templating is the foundation of every successful fabrication job. Errors here compound through every downstream step.
Digital templating (LT-55, Prodim, or similar) is the professional standard for complex kitchens, islands, and any job with appliance cutouts. It eliminates transcription errors and feeds directly into CNC.
Manual templating with luan or cardboard remains common for straightforward jobs. Use a consistent reference edge, mark all seam locations, and photograph every corner and appliance opening before leaving the site.
Pro Tip: Always note the direction of cabinet run and confirm whether the substrate is level. A 1/4" out-of-level run across 10 feet will affect seam alignment and reveal at the wall.
Key measurements to capture:
- Overall slab dimensions needed (with waste factor)
- Sink cutout size and undermount clip spacing
- Faucet hole locations and count
- Cooktop cutout if applicable
- Backsplash height and return dimensions
- Any notches, scribes, or irregular walls
Step 2: Slab Selection & Layout
Before cutting, lay your template on the slab and plan the cut layout. This step directly affects material yield, seam placement, and visual continuity.
- Match the movement: On slabs with strong veining, orient pieces so the pattern flows naturally across seams
- Avoid weak zones: Inspect the slab for fissures, pits, and inclusions — route cuts away from structural weak points
- Plan seams at low-stress locations: Avoid seams directly over dishwashers or at inside corners
- Mark the face side clearly before any cuts are made
Pro Tip: Photograph the full slab layout before cutting. If a client questions seam placement later, you have documentation of the decision.
Step 3: Cutting
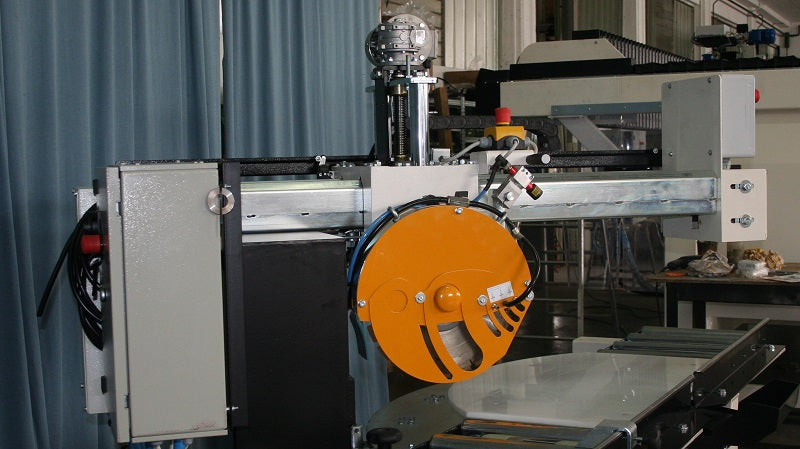
Granite cutting is typically done on a bridge saw (also called a revolving head saw when the blade head rotates for miter cuts) or CNC, with angle grinders used for detail work and cutouts.
Bridge saw cuts:
- Use a quality diamond blade rated for granite — blade selection directly affects cut quality, chip-out, and blade life
- Cut speed and water flow matter: too fast causes chipping; insufficient water causes heat buildup and premature wear
- Score the face side first on critical cuts to minimize chip-out on the finished surface
Sink cutouts:
- Drill relief holes at each corner before making straight cuts — this prevents cracking at the corner
- Use a core bit sized to your corner radius, then connect with straight cuts
- Support the cutout piece from below as you finish the last cut
Miter cuts (for waterfall edges or 45° joints):
- Requires a saw with a tilting or revolving head, or a dedicated miter sled
- Test fit before polishing — miter joints are unforgiving
Pro Tip: For porcelain or ultra-compact surfaces in the same shop, blade selection changes significantly. Don't use your granite blade on Dekton or Neolith without checking the manufacturer's spec.
Step 4: Edge Profiling
Edge profiling is where fabrication quality becomes visible to the homeowner. Common profiles include:
| Profile | Description | Tooling |
|---|---|---|
| Eased / Straight | Slight break on top corner | Router or hand pad |
| Beveled | Angled flat cut at 45° | Router bit |
| Bullnose | Fully rounded top edge | Profile wheel |
| Ogee | S-curve with cove and round | Multi-step router |
| Waterfall / Mitered | 45° miter joint, no edge profile | Bridge saw + adhesive |
| Chiseled / Rough | Textured, hand-worked look | Hand tools or chisel bit |
Portable routers are used for on-site edge work and repairs. Stationary edge machines (manual or CNC) handle production volume.
Pro Tip: Always profile edges before final polishing. Profiling generates heat and micro-scratches — you'll need to re-polish after routing regardless.
Step 5: Polishing
Polishing granite follows a grit sequence — skipping grits leaves scratches that show under raking light.
Typical grit sequence for granite:
50 → 100 → 200 → 400 → 800 → 1500 → 3000 → Buff
For a honed finish, stop at 400 or 800 depending on the desired sheen level.
For a leathered finish, use a brushing pad after the 200–400 stage instead of continuing to a high polish.
Flat surface polishing is done with a variable-speed angle grinder or planetary polisher and wet diamond polishing pads.
Edge polishing uses profile wheels on an edge machine or hand pads for portable work.
Pro Tip: Always polish wet. Dry polishing generates silica dust — a serious health hazard — and shortens pad life significantly. If you must dry polish in the field, use appropriate respiratory protection and dust extraction.
Step 6: Seaming
Seams are the most scrutinized part of any countertop installation. A tight, color-matched seam is the mark of a skilled fabricator.
Seam adhesive selection:
- Polyester (knife grade or flowing): Most common for granite; color-matchable; fast cure
- Epoxy: Stronger bond; better for repairs and structural seams; longer working time
- Cyanoacrylate (CA): Used for chip fills and tight crack repairs, not structural seams
Seam process:
- Dry fit both pieces and confirm the joint is tight with no rocking
- Apply seam adhesive to one edge; bring pieces together and align faces
- Use seam setters or clamps to hold alignment while adhesive cures
- Scrape flush, then sand and polish the seam area to blend
Pro Tip: Color-matching polyester to the slab is a skill. Mix small test batches on scrap before committing to the seam. Granite with heavy movement may need multiple pigments blended.
Step 7: Sealing
Granite is porous and should be sealed before installation and periodically thereafter. Sealing is often done in the shop before delivery.
- Apply sealer to a clean, dry surface
- Allow penetration time per manufacturer spec (typically 5–15 minutes)
- Wipe off excess before it hazes
- Allow full cure before installation
Pro Tip: Test the slab's absorption before choosing a sealer. Pour a small amount of water on the surface — if it absorbs in under 5 minutes, use a penetrating impregnating sealer. If it beads immediately, the stone may not need sealing at all.
Step 8: Delivery & Installation
- Use proper slab transport equipment — A-frame carts for shop movement, padded transport for delivery
- Vacuum lifters for loading/unloading reduce injury risk and surface damage
- Set countertops on a level substrate; shim as needed before adhesive is applied
- Secure undermount sinks with clips rated for the sink weight
- Caulk the wall joint with a color-matched silicone — never grout
Pro Tip: Bring touch-up adhesive and polishing pads to every installation. Small chips and scratches happen in transit. Fix them on-site before the client sees them.
Common Mistakes to Avoid
Even experienced fabricators run into these — knowing them in advance saves callbacks and material waste.
- Not drilling relief holes before sink cutouts. Straight cuts into a corner concentrate stress and crack the slab. Always drill first.
- Skipping grits in the polishing sequence. Jumping from 200 to 800 leaves sub-surface scratches that show under raking light or UV. Work every grit.
- Seaming over a dishwasher opening. Heat and vibration from the appliance stress the seam over time. Relocate the seam if at all possible.
- Insufficient water flow during cutting. Heat is the primary cause of blade glazing and premature wear. Keep water flowing consistently across the full cut.
- Profiling after final polish. Routing generates heat and micro-scratches — always profile before your final polish pass, not after.
- Applying sealer to a damp slab. Moisture in the stone prevents penetration and causes the sealer to haze or peel. The slab must be fully dry before sealing.
- Grouting the wall joint. Grout cracks as the countertop moves seasonally. Always use color-matched silicone at the wall.
- Not test-fitting seams before adhesive. Once polyester is applied, you have seconds to align. Dry fit every seam completely before mixing adhesive.
Frequently Asked Questions
How long does it take to fabricate a granite countertop?
A typical residential kitchen job runs 2–4 days from templating to installation. Templating takes 1–2 hours on-site. Shop fabrication (cutting, edging, polishing, seaming) typically takes 1–2 days depending on complexity. Delivery and installation add another half to full day. Rush jobs are possible but increase the risk of errors — don't compress the polishing sequence.
What diamond blade should I use for cutting granite?
Use a segmented or turbo-rim diamond blade rated specifically for granite and hard stone. Blade quality directly affects cut smoothness, chip-out on the face, and blade longevity. Cheap blades cost more in the long run through faster wear and more edge cleanup. See our Weha Diamond Blade Buying Guide and DiStar Diamond Blade Guide for specific recommendations.
How do I prevent cracking when cutting granite?
Three things prevent most cracks: (1) drill relief holes at all inside corners before making straight cuts, (2) maintain consistent water flow to prevent heat buildup, and (3) support the cutout piece from below as you complete the final pass. Unsupported cutouts drop and crack the slab at the last moment — a very expensive mistake.
Do I need to seal granite before installation?
Most granite should be sealed before installation, but not all. Do the water absorption test first: pour a small amount of water on the surface. If it absorbs within 5 minutes, seal it. If it beads immediately, the stone is dense enough that sealing may not be necessary. When in doubt, seal — it's cheap insurance against staining callbacks.
What causes seam lines to show on granite countertops?
Visible seams are usually caused by one or more of: mismatched slab height (faces not flush), poor color matching of the adhesive, insufficient polishing of the seam area after curing, or seam placement in a high-light zone. The fix is prevention — dry fit carefully, color-match your adhesive on scrap first, and polish the seam area through the full grit sequence after the adhesive cures.
Can I fabricate granite with an angle grinder?
Yes — for detail work, cutouts, edge profiling, and field repairs. An angle grinder with the right diamond blade or cup wheel is essential for sink cutouts, faucet holes, and on-site edge work. It's not a substitute for a bridge saw on straight cuts, but it's indispensable for everything the saw can't reach.
Recommended Tools & Supplies
The following products are available at Pro Tool Haus and are referenced throughout this guide:
Cutting
Edge Profiling
Polishing
Seaming & Repair
Sealing
Material Handling